Restring Baby Face Dolls by Galoob:
PrillyCharmin's Popbead Method!

MENU
1. INTRODUCTION
2. SUPPLIES & OVERVIEW
3. TAKING BF APART
4. RESTRING THE HEAD
5. RESTRING THE ARMS
6. RESTRING THE LEGS
7. THE BATHTUB DOLLS
8. TIPS & TRICKS

TAKE BABY FACE APART

THIS PAGE was updated July 18, 2020.
If you want to view the original instructions
which are now outdated, you can CLICK HERE.
The hardest part about restringing Baby Face is taking the doll apart, because there are many little pieces to remove. This page offers some tips that will make it easier for you.
PREP THE HEAD
Cut the cord at the neck.
It may be helpful to have a flashlight handy. You don't even have to shine the flashlight inside the neck: the flashlight will illumine the head somewhat if you aim it anywhere at the head.
Fishing the plastic cone out of the head will take some patience. I like to use a hemostat to grab the cone that's inside the head. I clamp and hold the cone with the hemostat. It might help if you warm the vinyl with your hairdryer, but I try to avoid that with the head because hair and lashes might be damaged.
Using the hemostats to hold the plastic cone, I use a wire clipper or fisherman's pliers to CUT the cone. Once there's a break in it somewhere, I continue to hold the cone with the hemostats and use my small pliers to break pieces off the cone until I can safely remove the cone through the neck hole without causing any damage. It doesn't matter if the head cone is mangled because we won't need it to restring the head.
Then, make sure there's no leftover cord or plastic pieces inside the head. Any leftover bits will rattle later.
PREP THE ARMS & LEGS

Cut the original strings at the shoulders and the hips.
Now we're going to remove the plugs from the hand and foot pieces. This is the most difficult part of restringing. Once you've got that done the rest of the project goes pretty fast.
TOOLS NEEDED
- 22 gauge Florist Wire
- Small metal HEX NUT (small enough to go through the hole in the arm or leg, but large enough that it won't go through the hole in the plug.) Hex nut means it has six sides.
- Hemostats and/ or Crochet hook
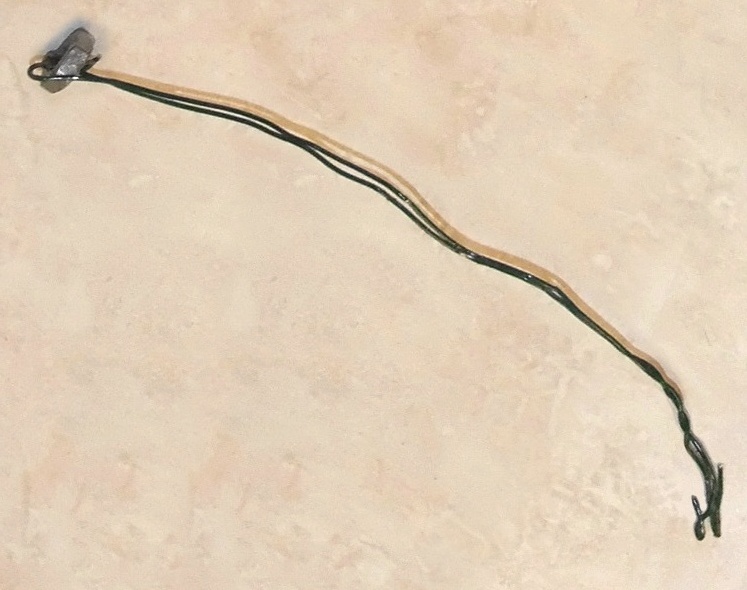
Cut a piece of florist wire that's approximately 14 inches long. Slide the hex nut to the middle and wrap the wire around the metal nut a couple of times so it won't move around. Twist the two wires together.
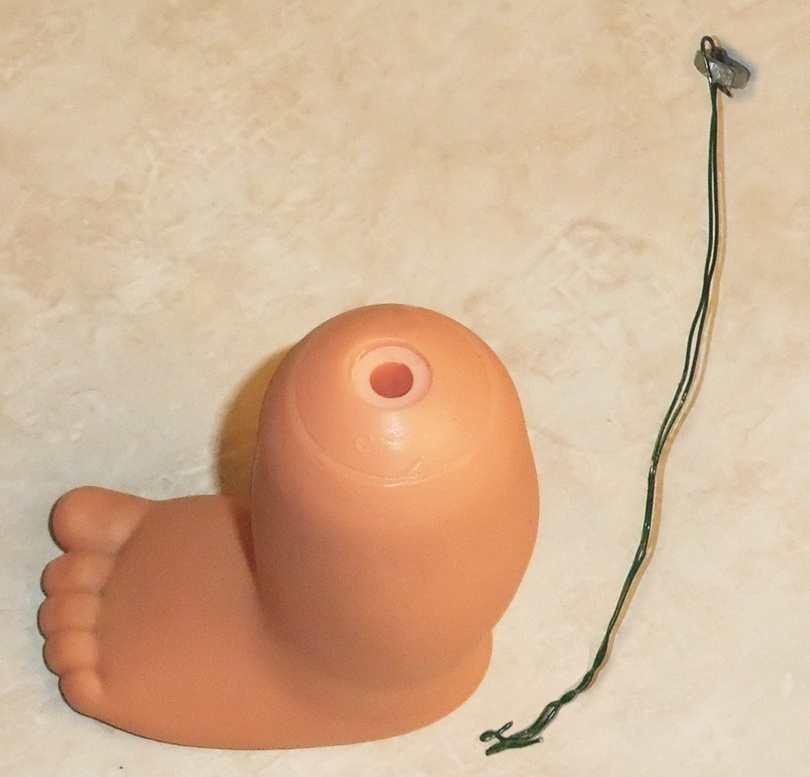
Push the end that does NOT have the nut in it through the vinyl hole AND through the middle of the plug. Keep pushing most of it through. Hang onto the nut, don't lose it.
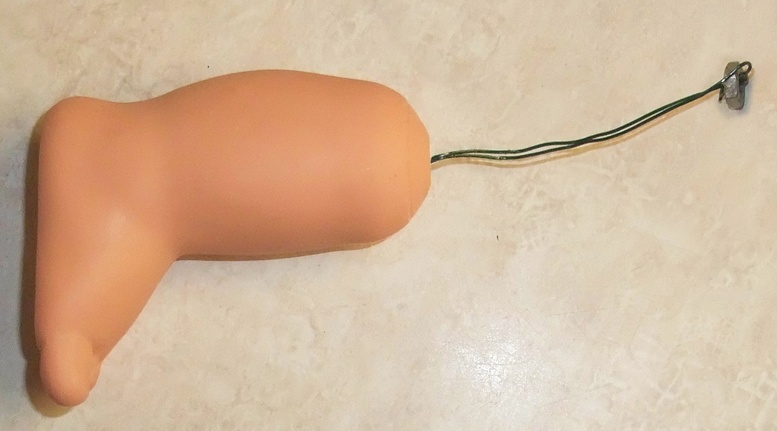
The wire will bend around inside the vinyl so it's easy to snag it with a crochet hook or hemostats. Make sure you're on the lower side of the plug when you hook the wire.
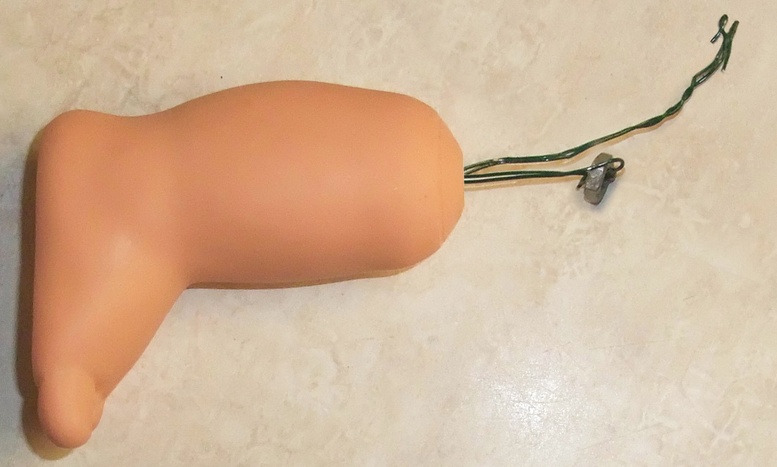
Gently fish the end of the wire out of the vinyl hole. It's possible that the wire could cut the vinyl so don't be too rambunctious about it.
DO NOT START PULLING YET!!!
The wire will most certainly cut the vinyl if you start pulling too soon. We have to reposition the wire so it's not touching the vinyl anywhere.
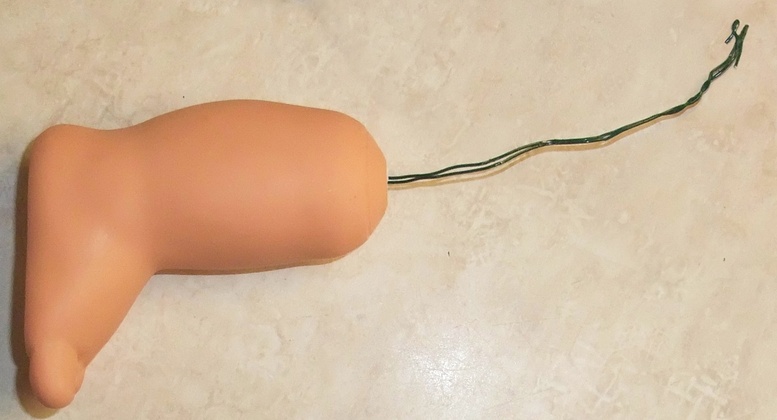
Push the metal hex nut into the hole. Pull on the other end of the wire. You'll have to do a push-pull-push-pull until the metal hex nut is INSIDE the vinyl piece and is snug against the bottom of the plug. (You'll be turning the plug around in the process.)
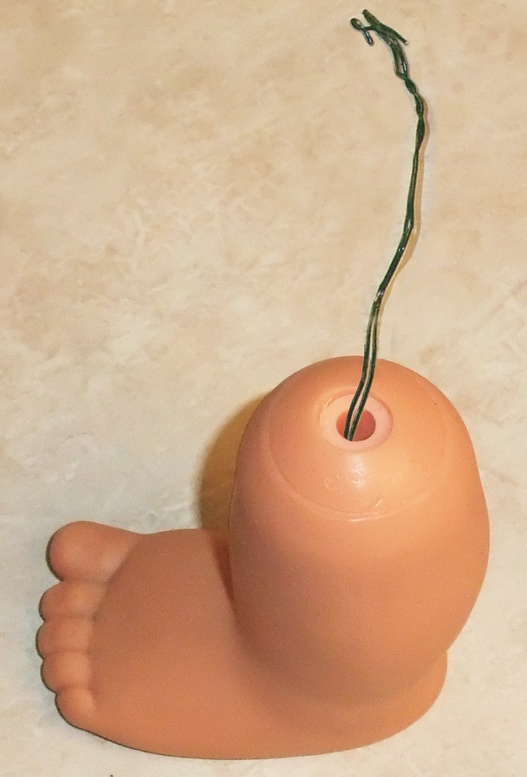
The wire is positioned properly if it's NOT touching the vinyl at all. The wires should only be touching the inside of the plastic plug.
DON'T PULL YET. First you have to warm the vinyl so it will be soft.
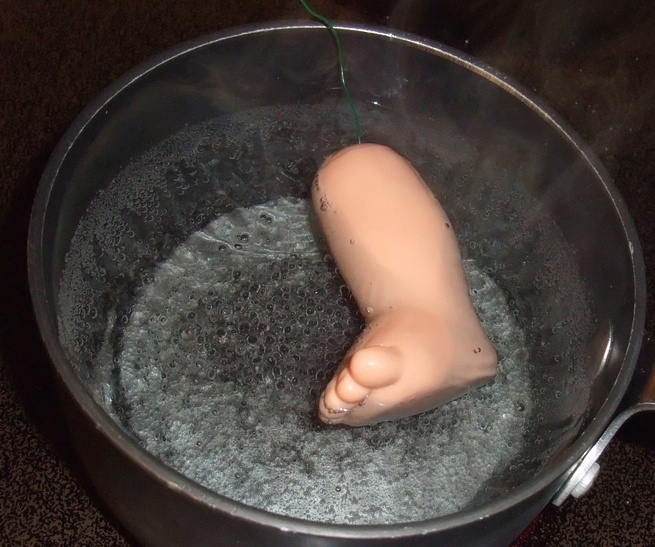
Heat the arm or leg so the vinyl is soft. I dip the vinyl piece in boiling water to soften it. The vinyl should feel very soft and flexible when it's warm enough.
SAFETY CHECK:
- Make sure there's no hot water in the warm vinyl piece. You don't want to get scalded!
Now it's time to pull the plug out. Clamp down on the wire with your pliers and start pulling. 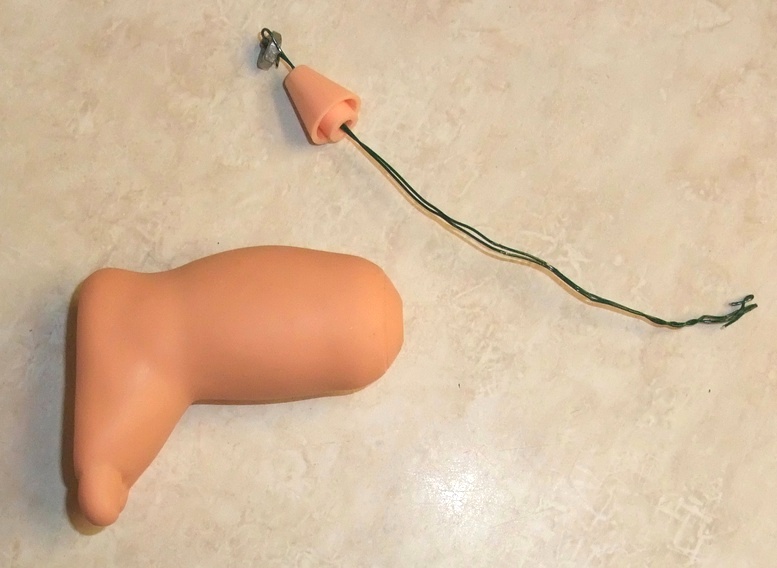
Yay! That's one plug down, three more to go!
Use a fresh piece of wire for each hand and each foot. I tried reusing the wire but once it's wrinkled and crumpled it was less cooperative.
Remove the plugs from both hand pieces and both foot pieces.
Be sure to fish out the bits of cord too, and then shake the pieces to make sure nothing is left in there to rattle around.
TIPS ON WARMING THE VINYL:
- Sometimes I warm the vinyl with my hair dryer. I warm it until the vinyl has gone soft. This doesn't take real long, but you can definitely tell the difference when it's warm and flexible.
- You can also warm the pieces in a pan of very hot water. I heat the water to boiling but I only warm up 1 or 2 pieces at a time. Boiling the vinyl strips it of oils and can possibly make it more brittle so I don't like to leave the vinyl pieces in the hot water any longer than necessary.
- There's no reason to boil the body at all: I only boil the 4 lower limbs so I can get the plugs out.
- Also, if left in the water too long vinyl can lose some of it's memory (yes vinyl has memory) and become distorted. Vinyl has the ability to bounce back into it's original shape, but only to a point. Too much heat or repeated heat can cause it to be misshapen.
- Although I use boiling water to take the doll apart, I wait until the pieces are completely dry inside before I assemble her again. I don't want water to be trapped inside and encourage mold.
- CAUTION! Whenever you attempt to stretch vinyl, use a certain amount of caution. Warm the vinyl first so it's pliable. And don't be so rough with it that the vinyl splits. We do make the disclaimer that if you are restringing your dolls there is some risk involved. Restring your dolls at your own risk.
If you really cannot remove the plugs from the arm and leg pieces, then I do have an alternative solution for you on the other tutorial pages. But it's best if you can get all the original parts out.
PREP THE BODY

The body has four cups inside, as well as bits of cord. It's easiest to remove these through the large hole in the doll's left side hip.
DON'T REMOVE ALL THE PIECES! You will remove ONE small cup and ONE large cup. Be sure to fish out all the bits of cord or other debris. There is also a small cone from the neck that you must remove. The only two pieces left inside should be a small cup and a large cup.
READY to REASSEMBLE

My Beth doll is completely un-assembled. This is the difficult part of restringing: the worst is over! Now that you've removed the little pieces, it's time to put your Baby Face doll together again. Restringing the doll is the easy part, and she will go together quickly.


