Restring Magic Attic Dolls
STEP 2: TAKE THE DOLL APART

THE CUP SYSTEM
Except for the early Knickerbocker MAC dolls, most of the Magic Attic dolls are strung together using a cup system. Each arm and each leg has it's own cup that is inside the body and the stringing cord is knotted through a hole in the cup. The arms and legs are only attached via these cups: each arm and each leg is strung separately this way.
I know of a few dolls that are assembled with the cup system. Baby Face by Galoob is one.
HOWEVER... we are not going to use any of the original cups to restring our model. The Magic Attic dolls that were made by Marian LLC have defective cups that are brittle, so there has been a serious problem with the legs falling off. Which is really a shame, and it's possibly the reason why the company chose not to make the dolls anymore: they had too many problems at the factory. (You can identify the Marian LLC dolls because they have a bellybutton: the Knickerbocker dolls do not have a bellybutton.)
I have chosen to restring the Magic Attic doll using a classic stringing method that is very similar to the way Knickerbocker strung the early MAC dolls. You might say that the MAC dolls are returning to their roots when you use my method to restring them.
START WITH THE ARMS (Not the Head!)
When you take the doll apart, DO NOT BEGIN WITH THE HEAD. Instead, take off one or both arms and then cut the PLASTIC tie strap that is holding the head on. Be careful NOT to cut the cord that is coming from the head and down through the neck. This will save you some trouble when it comes time to restring the head.
If you only need to restring the doll's head: you will remove the head and the arms. But: depending on how the doll was assembled in the first place, you might end up having to restring the entire doll after all. You won't know for sure until you take it apart. Regardless, start with the arms. If the legs are still attached after you remove an arm, then you got lucky.
To take the arms or legs off, pull the limb out and cut the cord that is holding it on. I use a small or medium size sharp scissors to cut the cord. If the connection is really tight, you may need to ask someone to pull the limb for you, so you can cut the cord.
STRINGING VARIATIONS
The Magic Attic Dolls are not all strung the same way. Just work with whatever you find in there. Some are held together with cups inside each joint, and some don't use cups.

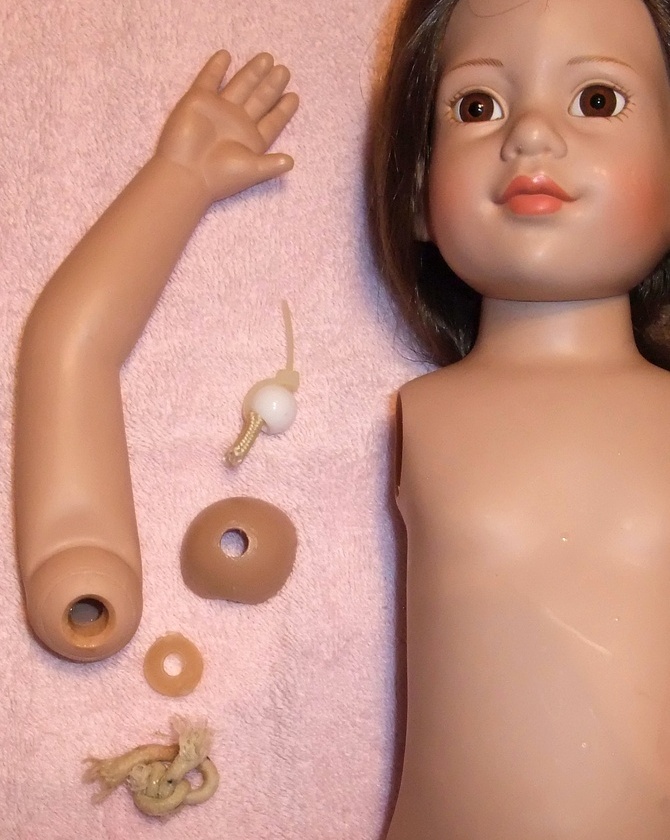
This photo (above) shows the pieces that typically hold the arms on. The round cup and the white bead are inside the body (the armhole.) The knotted cord and the tan washer are what came out of the arm.

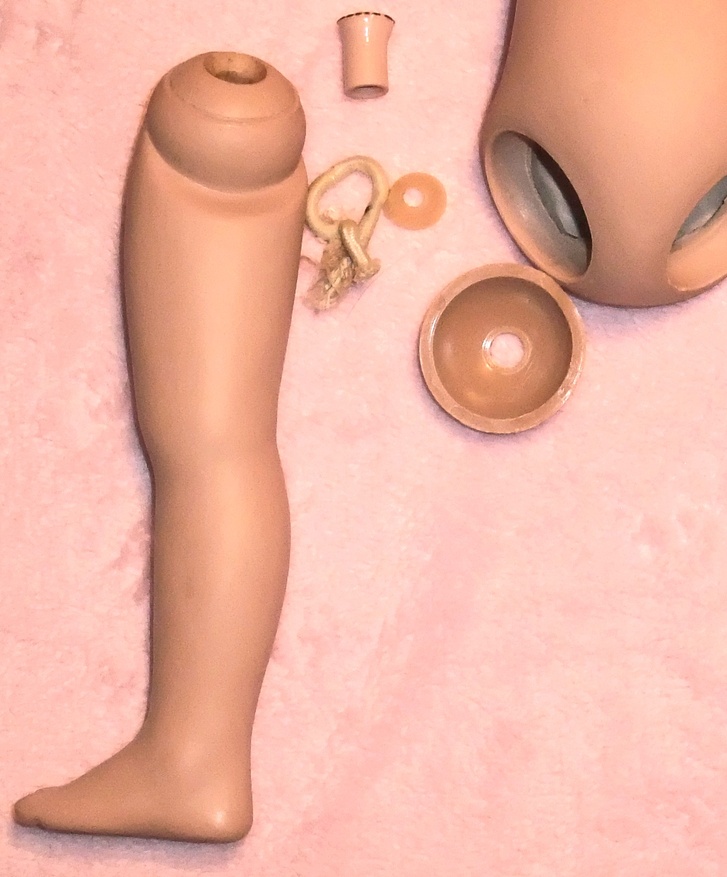
This photo (above) shows the pieces that hold the leg on. The cup and the plastic tube are inside the body. The knotted cord and the tan washer came from the leg.

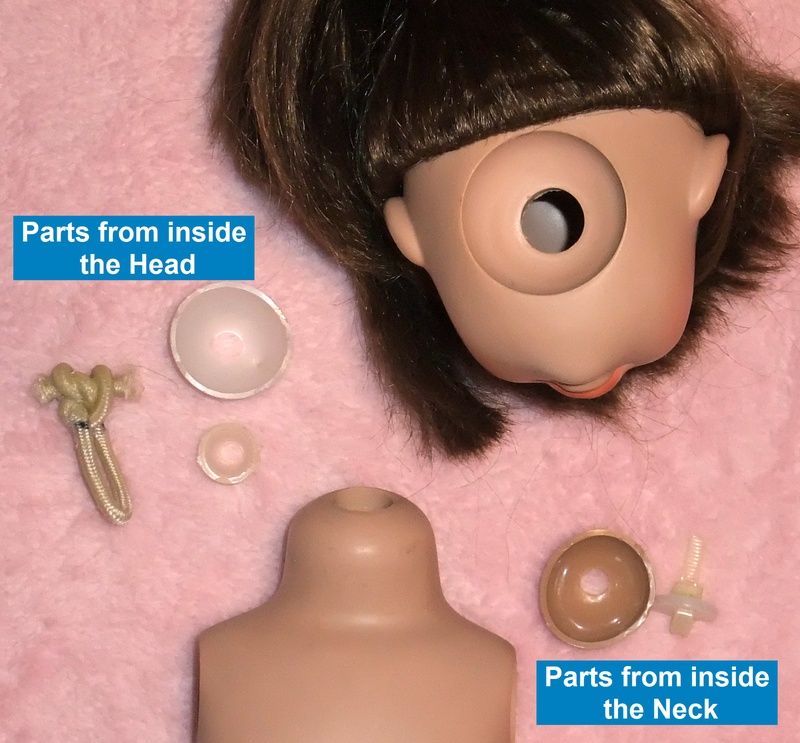
This photo (above) shows what is inside the head and the neck of the doll. You don't want to remove the pieces from the head unless they're broken and unusable.
The neck pieces do need to be removed from the body.
REMOVE THE BITS & PIECES
After you have cut the cords, remove all loose parts from inside the body of the doll. You don't need to remove anything from inside the head: only the body. Be sure to get all the little bits out of the body so there won't be anything rattling around in there later.
Then you need to remove the plastic bits from inside the limbs. The only way to do this is to heat the rounded end in boiling hot water. You don't need to heat up the entire arm or leg: only the rounded end with a small hole in it.
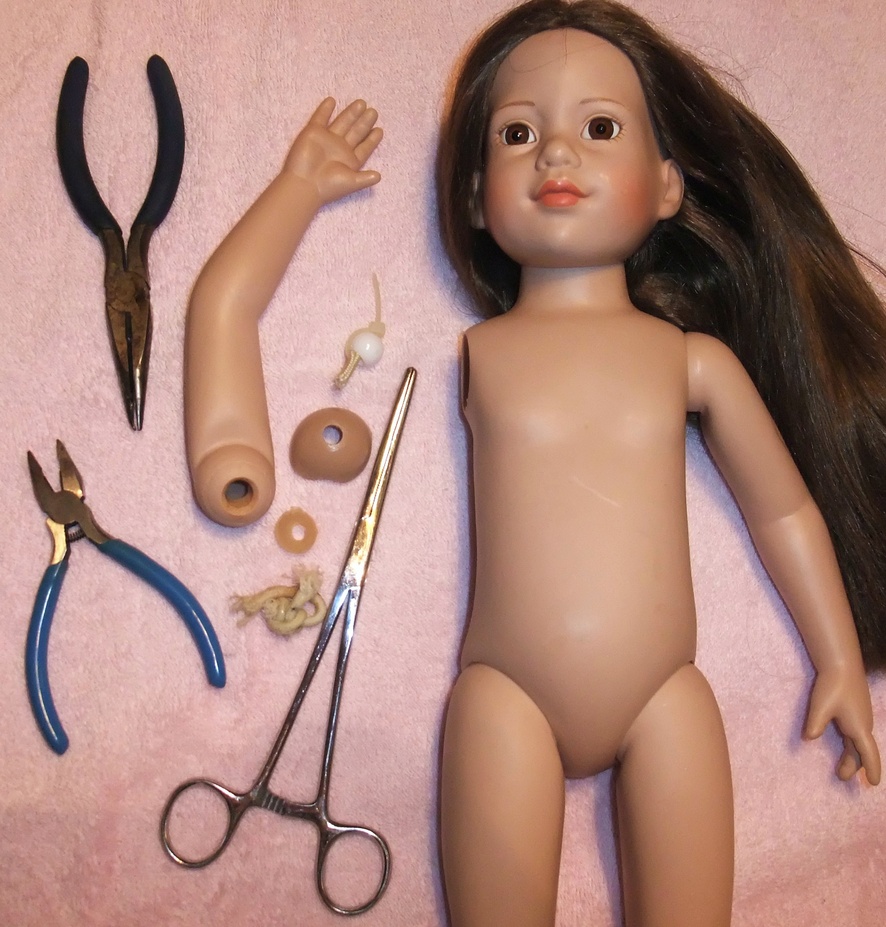
I dip the arm or leg in the water for 30 seconds (or more) until the vinyl is soft and then fish the pieces out with a needlenose pliers or hemostat.

Sometimes it helps to use my small blunt nose pliers to widen the hole a little. You do need to be careful not the split the vinyl if you do that. Widen it ONLY when the vinyl is warm from the boiled water. While the vinyl is warm, I push the small pliers in the hole and then open it to stretch the warm vinyl. Then, while the hole is slightly larger, quickly fish out the pieces.
ALLOW TO DRY
After you have removed the pieces from the limbs, allow the arms and legs to dry before assembling the doll. You can use a hair dryer to dry them out, as well.
THE HARD PART IS DONE!
In my experience, it's harder to take the doll apart than it is to put it back together. That's good news, isn't it?
(c) Copyright 2018 Cynthia A. Stevens All rights reserved.


