1.
RESTRING THE HEAD FIRST: With the popbead method you can restring one part, or all of them. But if you're going to restring the HEAD, do that FIRST because the other beads tend to crowd the body and you'll have problems getting the parts for the head in place if you do the arms or legs first.
2. You can remove all the cups and cord pieces from the body via the large hip hole (on the doll's left side), which is much easier than trying to squeeze the pieces out of the smaller body holes.
3. DON'T GET MIXED UP: Be sure you have the arms & hands, thighs & feet lined up properly before you get started. I keep the left pieces on the doll's left, and the right pieces on the doll's right. Otherwise you might get pieces mixed up: knees on backwards, hands on the wrong sides, etc.
4. VINYL IS TOO HARD: Use the hair dryer if you need to warm the vinyl first. In cold weather, or cold climates, the hair dryer is more important! We are in Florida so it's usually warm here.
5. VINYL IS TOO SOFT: Sometimes vinyl is hard, and other times it can be too SOFT! Recently I restrung a Beth doll; her head and body were soft and pliable, so the pop-beads would not pop through their holes. Instead, the body and the head just folded in on themselves. No amount of pushing or prying helped. So, I put the doll in the freezer for 3 minutes, and then I was able to push the popbeads in place without any further trouble. (Just don't leave her in there for more than 3 to 5 minutes!)
6. Once you're comfortable with this procedure, it can take less than an hour to completely restring a Baby Face doll. And she will be VERY snug, good for years to come!
Our Beads & Washers Kit for
Regular Baby Face Dolls:

Our Beads & Washers Kit for
Bathtub Baby Face Dolls:
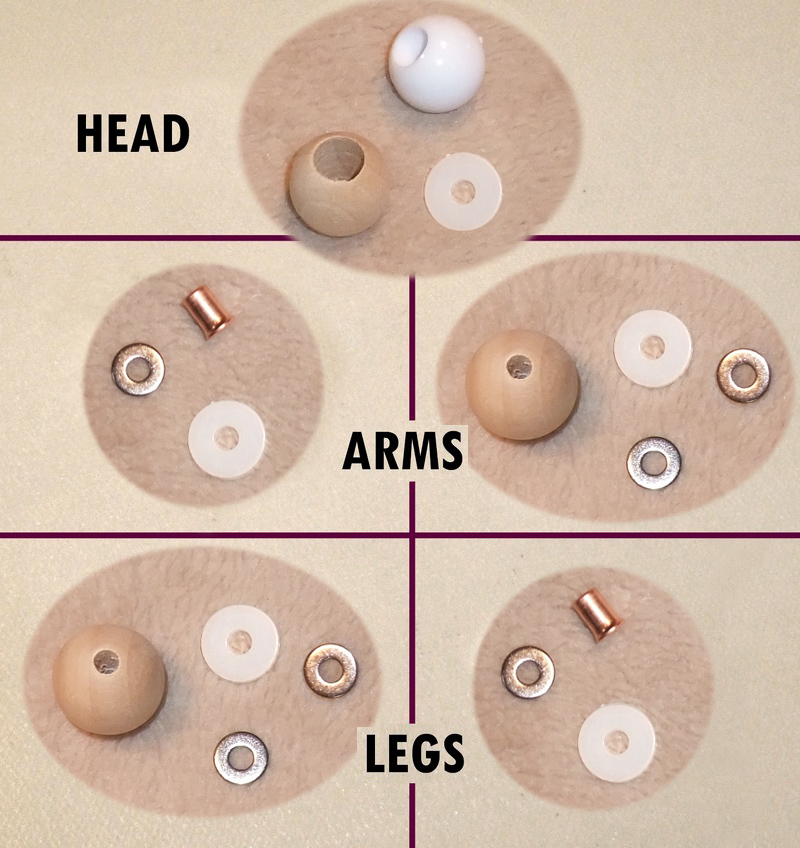

We have a special restringing kit for BABY FACE in our doll shop. CLICK HERE to visit our supplies section at PrillyCharmin's doll shop.
MENU
1. INTRODUCTION
2. SUPPLIES & OVERVIEW
3. TAKING BF APART
4. RESTRING THE HEAD
5. RESTRING THE ARMS
6. RESTRING THE LEGS
7. TIPS & TRICKS